

Tarp Tent Setup Guide: Your Essential Handbook for 2025
RankPill on 26th Nov 2025
Imagine transforming your next outdoor adventure with a tarp tent setup that promises both simplicity and versatility. In 2025, lightweight shelters are more advanced and accessible than ever, making your time in nature comfortable and hassle-free.
This handbook is designed to guide you through every step of a successful tarp tent setup. With expert advice, up-to-date techniques, and practical tips, you will gain the confidence to create a reliable shelter in any environment.
Inside, you will explore essential gear choices, smart site selection, popular shelter shapes, weatherproofing strategies, and troubleshooting tips. Whether you are a seasoned camper or just starting out, this guide ensures you are prepared for whatever nature brings.
Ready for a seamless camping experience? Let this practical resource show you how a tarp tent setup can redefine your adventures and give you the freedom to camp your way.
Why Choose a Tarp Tent? Benefits and Use Cases
Choosing the right shelter is crucial for any outdoor adventure. A tarp tent setup offers unique advantages over traditional tents, making it a preferred option for many modern campers. If you are seeking a lightweight, adaptable, and practical solution, the tarp tent setup stands out as an essential piece of kit.
A major benefit is the impressive reduction in weight and bulk. Traditional tents often require poles, inner linings, and heavy fabrics, which add to your pack. In comparison, a tarp tent setup is simple, packs down small, and can weigh as little as 300 grams, depending on the material and size. This means more space for essentials and less fatigue during long treks.
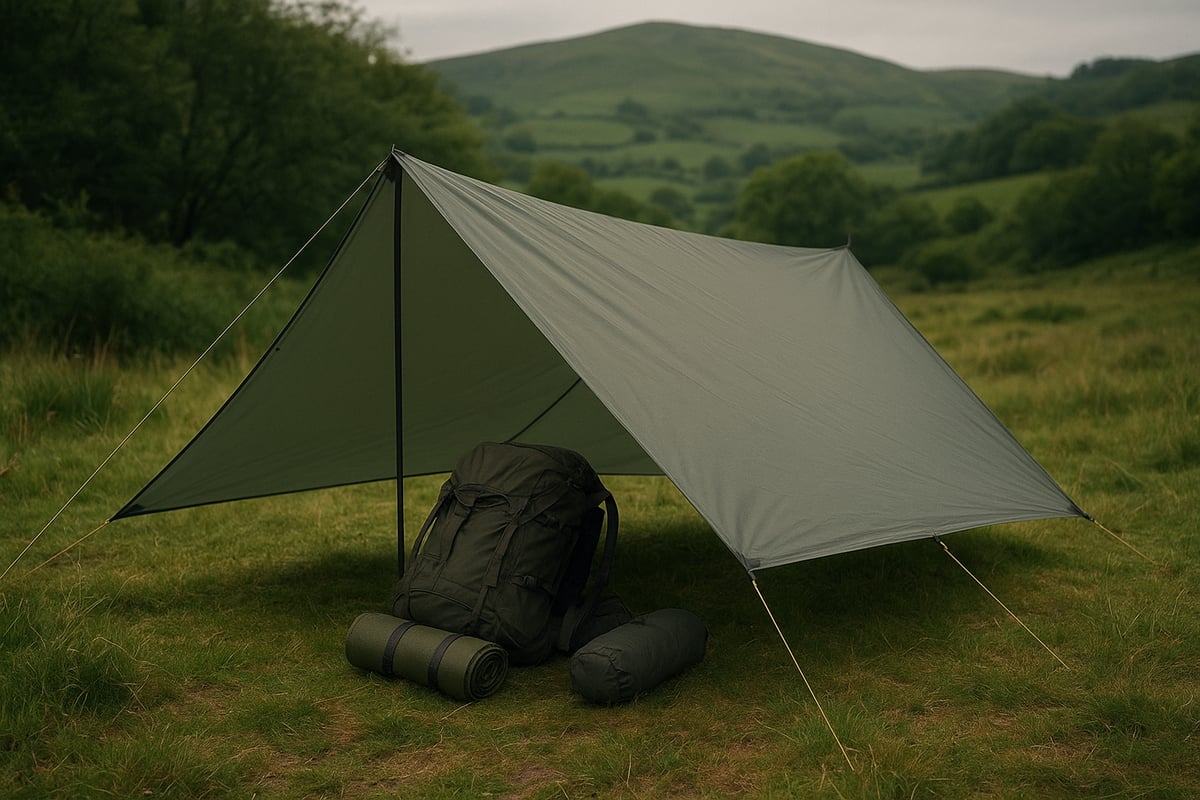
Versatility is another defining feature. With a tarp tent setup, you can tailor your shelter to suit solo trips, family outings, or group expeditions. The same tarp can be used as a sleeping shelter, a communal area, a gear cover, or even an emergency bivvy when conditions demand rapid adaptation. For those who value flexibility, this adaptability is unmatched.
The multi-functional nature of a tarp tent setup extends its value far beyond just sleeping arrangements. Imagine covering your equipment during a sudden downpour, creating communal shade at a festival, or building a quick windbreak for lunch in the hills. In emergencies, the tarp tent setup can be transformed into a stretcher, rain poncho, or improvised shelter, ensuring safety and comfort in unpredictable scenarios.
From a cost perspective, a tarp tent setup is often significantly less expensive than specialist tents or hammocks. Many high-quality tarps are available at a fraction of the price, with no compromise on durability or performance. When you consider the lifespan and repairability of a good tarp, the long-term savings become even clearer.
Practical use cases abound. Wild campers appreciate the minimal weight and stealthy profile of a tarp tent setup, especially in remote areas like Dartmoor or the Scottish Highlands. Bushcrafters value the connection to nature and the skills involved in pitching a tarp. Backpackers enjoy the reduced pack weight, while festival-goers benefit from quick setup and communal space. Overlanders and cyclists, too, favour tarp tent setups for their compact storage and rapid deployment.
Environmental considerations are increasingly important for outdoor enthusiasts. A tarp tent setup leaves a much smaller footprint, both physically and ecologically. With no groundsheet or fixed structure, it is easier to adhere to leave-no-trace principles. Tarps can be pitched with minimal disturbance to vegetation, and their lightweight nature means less energy used in production and transport.
Industry statistics reflect this growing trend. According to outdoor retail surveys, there has been a 30% increase in UK wild camping with tarps since 2022. This surge is attributed to both the practicality and sustainability of the tarp tent setup. For a deeper dive into the core benefits, you might find 10 reasons to try tarp camping a valuable resource.
In summary, the tarp tent setup is a modern solution offering lightweight versatility, unmatched adaptability, and real value for money. Whether you are wild camping, attending a festival, or preparing for emergencies, the tarp tent setup deserves a place in your outdoor arsenal.
Essential Gear and Preparation for 2025
Setting yourself up for a successful tarp tent setup in 2025 begins with understanding the gear that makes the difference between a comfortable night outdoors and a challenging experience. Advances in materials, accessories, and preparation strategies mean that modern campers can tailor their tarp tent setup for any adventure, from wild camping to family festivals.
Choosing the Right Tarp
Selecting the best tarp is the cornerstone of any tarp tent setup. The material you choose will impact your shelter’s weight, durability, weather resistance, and environmental impact. Here’s a quick comparison:
| Material | Weight | Durability | Water Resistance | Best Use |
|---|---|---|---|---|
| Silnylon | Very Light | Moderate | Excellent | Backpacking, fastpacking |
| Canvas | Heavy | Outstanding | Good (when treated) | Bushcraft, UK conditions |
| Polycotton | Moderate | Good | Good | Family camping, comfort |
| Polyethylene | Light | Moderate | Excellent | Emergencies, festivals |
For UK conditions, canvas tarps are renowned for their resilience and ability to withstand abrasive terrain and unpredictable weather. If you prioritise minimal weight for long treks, silnylon or polyethylene tarps are the go-to options. For those interested in robust and traditional shelter, you can explore the best canvas tarps for shelter to find an option that fits your tarp tent setup needs.
Shape and size also matter. Square tarps offer flexible pitching options, while rectangular and hex designs provide extra coverage. Diamond tarps excel for minimalist bivvy setups. Always match the tarp’s size to the number of occupants and planned configurations.
Must-Have Accessories
No tarp tent setup is complete without the right accessories. The correct combination of gear ensures your shelter remains secure, adaptable, and easy to pitch in any scenario.
Essential accessories include:
- Guy lines: Opt for reflective lines for night-time visibility. Vary lengths for different configurations.
- Pegs and stakes: Choose aluminium or titanium for strength and lightness. Consider ground type—longer pegs for loose soil, shorter for rocky areas.
- Poles or trekking sticks: Adjustable poles add flexibility. Trekking sticks can double as supports, saving weight.
- Repair kits: Carry tape, spare line, and grommets for field repairs.
- Spare parts: Extra pegs, clips, and cordage can save a tarp tent setup from unexpected issues.
When packing, organise accessories in a dedicated pouch for quick access. This approach streamlines your tarp tent setup and reduces the risk of leaving crucial items behind.
Packing and Pre-Trip Preparation
Thorough preparation is vital for a reliable tarp tent setup. Begin by distributing the weight of your tarp, poles, and accessories evenly in your pack. Place heavier items close to your back and lighter gear towards the top.
Run through a pre-trip checklist:
- Inspect your tarp for holes or worn seams.
- Test guy lines and knots.
- Check that pegs and stakes are undamaged.
- Confirm poles are fully functional.
- Ensure your repair kit is complete.
Weather forecasting is a key part of tarp tent setup planning. Study the conditions for your destination and adjust your packing accordingly. For example, bring extra guy lines if strong winds are expected. According to a 2024 UK camping survey, 67% of tarp campers attribute successful trips to careful preparation, highlighting its importance for every tarp tent setup.
By investing time in gear selection, accessories, and pre-trip checks, you set the stage for a trouble-free tarp tent setup—whatever the weather or terrain.
Step-by-Step Tarp Tent Setup: A Chronological Guide
Mastering a successful tarp tent setup is about more than just throwing a tarp over some rope. Each step in the process builds towards a safer, more comfortable, and weatherproof shelter. Whether you are new to tarp camping or refining your skills for 2025, follow this chronological guide to ensure a hassle-free experience.
Step 1: Site Selection and Assessment
The foundation of every tarp tent setup is choosing the right spot. Start by scanning your surroundings for level ground. Avoid depressions that could collect water if it rains overnight. Seek out natural windbreaks like hedges, boulders, or tree lines, which can shield your shelter from gusts.
Before laying out your tarp, look upwards. Assess trees for dead branches or hanging debris that could fall. Steer clear of flood-prone areas, and check for insect nests or animal trails to minimise disturbances.
Checklist for site assessment:
- Level, well-drained ground
- Natural windbreaks nearby
- No overhead hazards (dead wood, loose rocks)
- Away from waterlogged zones
- Low insect and wildlife activity
For example, on Dartmoor, balancing a scenic view with protection from prevailing winds often means tucking in behind a low rock outcrop or within a sparse copse. Taking time for this step ensures your tarp tent setup remains stable and comfortable throughout your stay.
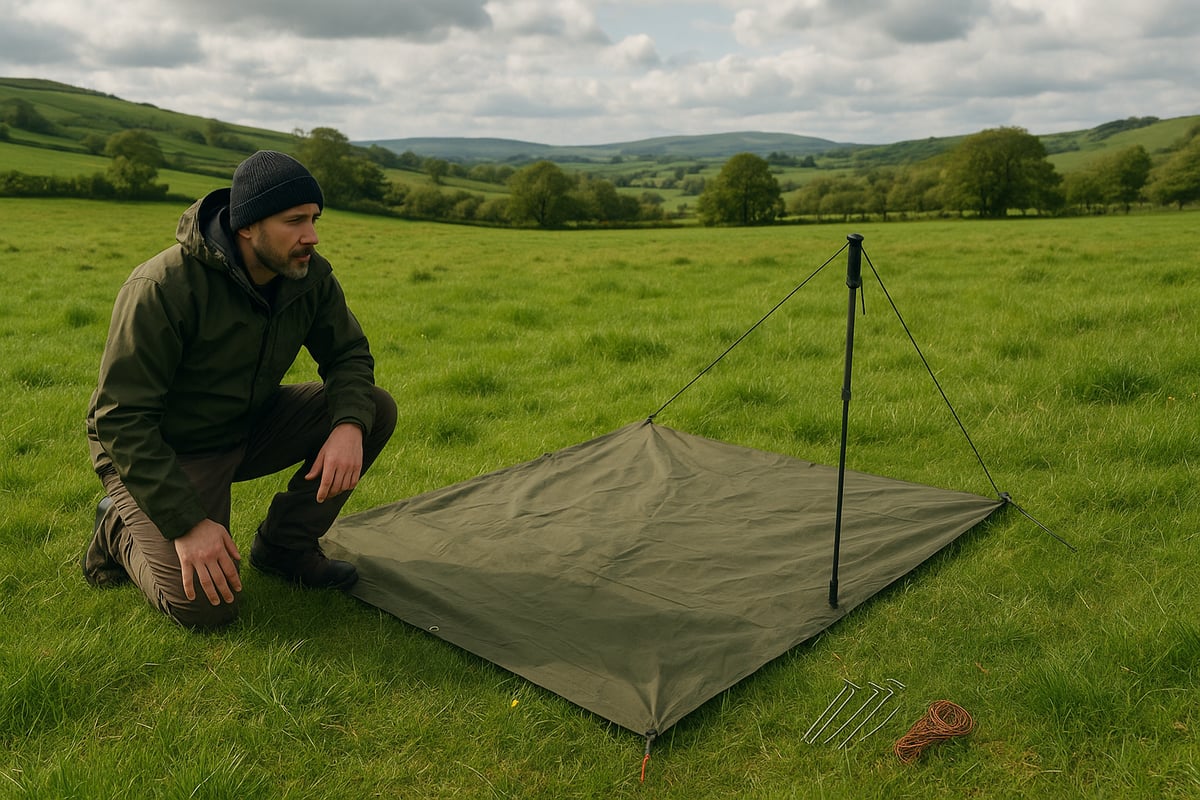
Step 2: Laying Out and Anchoring the Tarp
Once you have found your site, unroll your tarp and orient it to face away from the prevailing wind. Position the tarp so the widest side blocks the wind or rain direction.
Secure each corner with pegs or natural anchors, such as rocks or sturdy roots. When using guy lines, select knots that offer reliability and adjustability. Two of the most common are the taut-line hitch and bowline. These allow you to keep tension without constant adjustments.
Common anchoring options:
- Aluminium or titanium pegs for rocky ground
- Wooden stakes for softer earth
- Tree roots or large stones as natural anchors
If you are on uneven terrain, use extra guy lines to stabilise the structure. This stage is vital for a robust tarp tent setup, as a poorly anchored tarp can quickly collapse in wind or rain. Double-check each anchor point before moving to the next step.
Step 3: Configuring the Shelter Shape
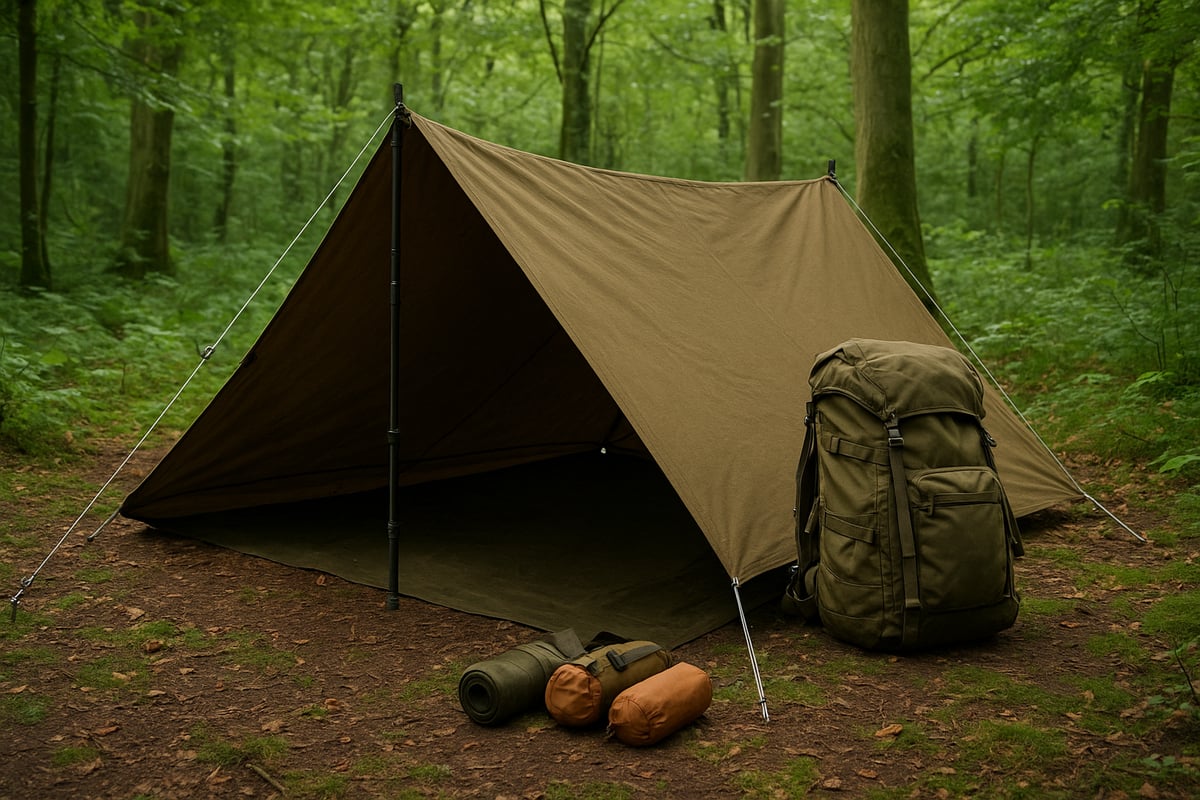
With your tarp anchored, it is time to choose the optimal shelter configuration. This decision depends on weather, group size, and available space. The A-frame is a favourite for its simplicity and rain protection, while the lean-to offers great ventilation and open views.
Popular configurations:
| Configuration | Best For | Pros | Cons |
|---|---|---|---|
| A-frame | Rain, wind | Stable, drip-free | Less headroom |
| Lean-to | Views, airflow | Easy access, airy | Less rain protection |
| Diamond fly | Solo, fast setup | Minimal pegs, quick | Limited space |
| Plough point | Storms, solo | Low profile, windproof | Compact, less storage |
Adjust pitch height for your needs. Raise it for airflow on warm nights, or lower it close to the ground for storm protection. For more detailed instructions on configuring different tarp setups, see this A-Frame Tarp Shelter Setup guide.
Experiment with shapes to suit your environment. Mastering this step ensures your tarp tent setup adapts to any condition.
Step 4: Tensioning and Adjustments
Proper tensioning is the secret to a reliable tarp tent setup. A taut tarp sheds rain and resists wind, while loose fabric leads to sagging and pooling. After pitching your chosen shape, walk around the shelter and gently pull each guy line. Adjust knots as needed to remove slack.
Tips for tensioning:
- Keep the surface smooth to prevent water collection
- Use adjustable knots for on-the-fly changes
- Check for flapping corners and secure them
If wind direction shifts or rain intensifies, readjust your lines. Minor tweaks can make a major difference in comfort and durability. Troubleshoot issues like sagging or pooling quickly, using spare cordage if necessary. This proactive approach keeps your tarp tent setup in top condition.
Step 5: Interior Setup and Comfort
The final stage is creating a comfortable living area under your tarp. Lay a groundsheet or bivvy bag to stay dry and protect against sharp objects. Designate a dry entryway, keeping gear stored off the ground and within easy reach.
Consider adding a mosquito net for insect protection, especially in woodland or near water. Always keep sharp tools, like knives or stoves, away from sleeping areas to prevent accidents.
Safety checklist:
- Store food securely to deter wildlife
- Never use open flames inside or near the tarp
- Mark guy lines with reflective tape for night-time visibility
A thoughtful interior setup transforms your tarp tent setup from basic shelter to a welcoming retreat. Prioritise both safety and comfort for a restful night outdoors.
Weatherproofing and Advanced Tarp Techniques
Mastering weatherproofing is at the heart of a reliable tarp tent setup. Whether facing a sudden downpour or a biting wind, the right techniques can make all the difference in comfort and safety. This section explores key methods to keep your shelter resilient, whatever the forecast brings.
Rain and Storm Protection
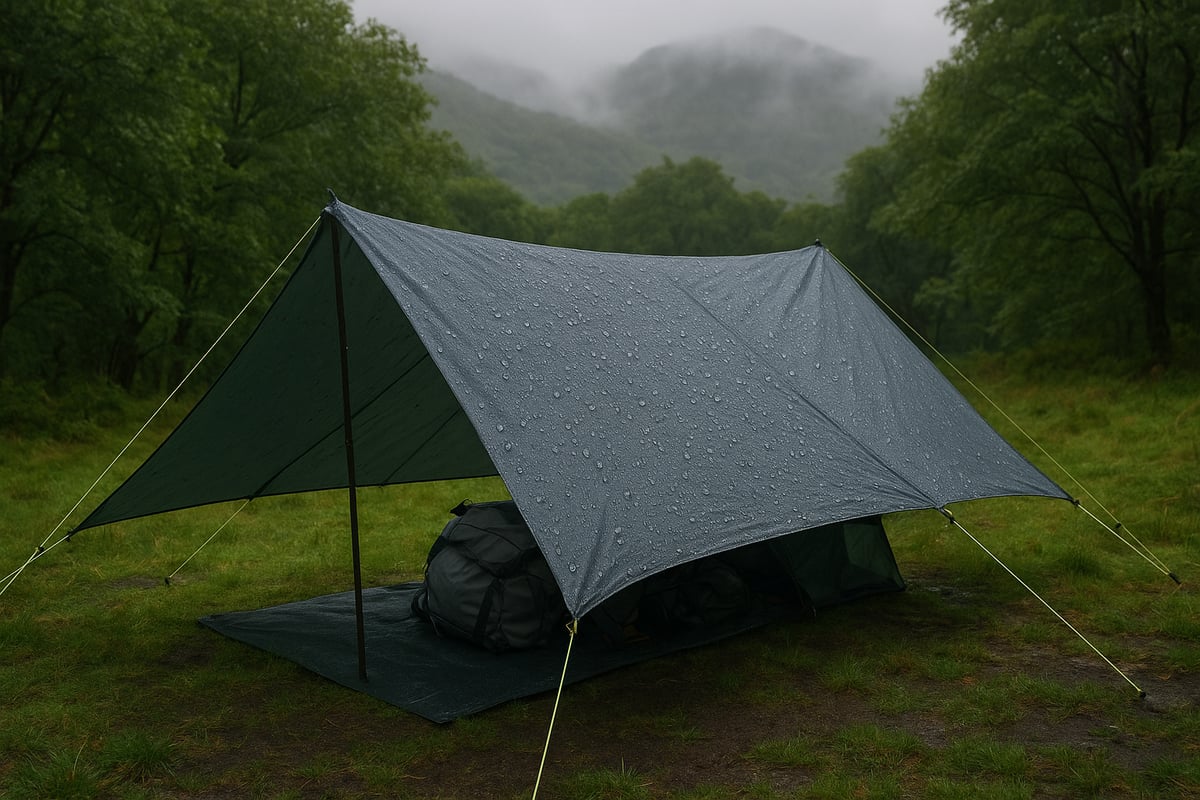
Rain is a constant companion for UK campers, so a tarp tent setup must be ready for wet weather. Overlapping the edges of your tarp is crucial to prevent water ingress. Position the tarp with a slight slope, encouraging rain to run off instead of pooling.
Adding drip lines—a length of cord tied below guy lines—channels water away before it reaches your sleeping area. Trenching can be considered where permitted, using a shallow channel to divert water away from your shelter. For severe storms, double layering with a second tarp provides an extra barrier and peace of mind.
Natural features also play a vital role. Pitching near dense foliage or on the lee side of a hill can shield your tarp tent setup from driving rain. For example, during a Lake District downpour, campers often favour a diamond pitch configuration for its combination of coverage and runoff.
If you want to see a practical demonstration of these techniques, detailed visual instructions are available in the DD SuperLight Tarp Tent Instructions, which illustrate advanced weatherproofing for various tarp shapes.
Wind and Snow Adaptations
Strong winds and snow demand specific adjustments to your tarp tent setup. Opt for a low-profile pitch—such as a classic A-frame—when wind speeds rise. Keeping the shelter close to the ground reduces its surface area and exposure, making it less likely to collapse.
Snow-load management is equally important. Use a sloped pitch so snow slides off easily, and reinforce anchor points with extra stakes or by tying off to sturdy trees. In the Scottish Highlands, where wind speeds can reach 60 mph, a low A-frame configuration is frequently chosen by experienced tarp campers for its stability and ease of tensioning.
A comparative table can help clarify which configurations suit each condition:
| Weather Condition | Ideal Tarp Shape | Key Adaptation |
|---|---|---|
| High Wind | Low A-frame | Minimal height, tight pitch |
| Heavy Snow | Steep Sloped | Reinforced anchors, runoff |
| Mixed | Catenary/Plough | Versatile, quick adjustments |
Continuous monitoring and adjustment are essential. Check guy lines regularly, and be prepared to re-tension as conditions shift. A robust tarp tent setup can withstand even the harshest weather when set up with foresight.
Insulation and Temperature Control
A thoughtful tarp tent setup also addresses temperature control. Start by laying down insulating mats or reflective blankets beneath your sleeping area. These layers buffer against cold ground and help retain warmth.
Windbreaks—natural or created with spare tarps—reduce heat loss. For ventilation, pitch your tarp with adjustable openings. This minimises condensation, a common issue in humid UK climates. If temperatures drop, closing off windward sides can trap more heat, while in milder conditions, higher pitches encourage airflow.
Condensation is best managed by maintaining a gap between the tarp and ground, allowing moist air to escape. Combining these strategies ensures your tarp tent setup is comfortable and adaptable, no matter the season.
Common Mistakes and Troubleshooting for Tarp Tents
Even seasoned campers can run into trouble with their tarp tent setup. Understanding frequent pitfalls and knowing how to fix them will save you time and ensure a safe, comfortable adventure. With more UK campers embracing tarps each year, avoiding these common errors is essential for a reliable shelter.
Common Mistakes in Tarp Tent Setup
Simple errors can quickly turn a restful night into a damp, uncomfortable ordeal. Over-tightening guy lines is a frequent issue, causing unnecessary stress on the tarp fabric. This can lead to rips, especially in lightweight materials. According to Outdoor Gear Lab, 42% of tarp tent failures are due to improper tensioning.
Poor site selection is another culprit. Setting up on uneven ground or in a natural depression may result in water pooling beneath your shelter. Always assess your surroundings for hazards such as overhanging branches, insect nests, or potential flood zones before starting your tarp tent setup.
Anchoring and Weather Challenges
Insufficient anchoring is a leading cause of tarp collapses during windy nights. Using short pegs or failing to secure all corners leaves your shelter vulnerable. For best results, choose pegs suited to the ground type and reinforce with natural anchors like rocks or logs when possible.
Neglecting the weather forecast can leave you exposed to sudden storms or shifting winds. Always plan for changing conditions, and consider carrying extra guy lines and pegs for added stability. A recent UK Camping Statistics 2024 report highlights that weather-related issues remain one of the top reasons for abandoned tarp tent setup attempts.
Quick Fixes and Field Repairs
Even with preparation, problems can arise. Carrying a compact repair kit can make the difference between a ruined trip and a quick recovery. Essential kit items include:
- Duct tape for patching small tears
- Spare cordage for replacing broken guy lines
- Extra pegs or stakes
- A small sewing kit for emergency stitching
If your tarp tent setup starts to sag or leak, first check all guy lines for even tension. Adjust as needed, and use your repair kit to patch any damage. Real-world examples from UK wild camping forums often mention these field repairs saving the day when unexpected issues occur.
Troubleshooting Table
| Mistake | Symptom | Quick Fix |
|---|---|---|
| Over-tightened guy lines | Fabric tears | Loosen lines, apply duct tape |
| Poor site selection | Water pooling | Move tarp, add groundsheet |
| Weak anchoring | Shelter collapse | Reinforce with rocks, extra pegs |
| Ignoring weather forecast | Exposure, leaks | Adjust setup, use spare lines |
For further safety guidance, review this How to camp safely outdoors resource, which covers practical tips to enhance your tarp tent setup and protect your gear.
Expert Tips, Safety, and Responsible Camping
Mastering your tarp tent setup means more than just staying dry. It is about adopting expert strategies, prioritising safety, and embracing responsible camping. In this section, you will discover actionable tips and the latest community-driven innovations to ensure every tarp tent setup is efficient, safe, and environmentally friendly.
Pro Tips for a Successful Setup
To get the most from your tarp tent setup, consider these expert recommendations:
- Layer your tarps for modular shelter. This lets you adjust coverage for changing weather or group size.
- Integrate your tarp with a hammock or bivvy bag to increase comfort and protection.
- Use reflective guy lines and markers to prevent tripping over lines at night and improve visibility.
- Practice different tarp pitches at home before your trip, so you are confident in the field.
By experimenting with various tarp tent setup configurations, you will find the best solution for your needs. Remember, a flexible approach makes your shelter adaptable to unexpected conditions.
Safety and Environmental Best Practices
Responsible tarp tent setup goes hand in hand with safety and environmental care. Always follow leave-no-trace principles by minimising your campsite footprint and packing out all rubbish. Store food securely to avoid attracting wildlife, and never leave food scraps behind.
Open-sided shelters require extra care with fire safety. Always set up your tarp tent setup well away from open flames and use a groundsheet to protect both yourself and the environment. When selecting gear, opt for eco-friendly materials where possible. For more advice on sustainable gear choices, see this Guide to sustainable outdoor gear.
Prioritising these practices ensures your tarp tent setup leaves natural spaces pristine for others to enjoy.
Community Insights and Innovations for 2025
The tarp tent setup community continues to drive innovation. In 2025, campers are embracing new eco-friendly materials and smart tie-outs that simplify pitching and improve durability. Community-led tarp meetups across the UK foster shared learning, with experienced bushcrafters offering practical demonstrations.
Recent trends include modular tarp tent setup kits and digital resources for learning advanced techniques. Engaging with these communities will keep your tarp tent setup skills sharp and help you discover the latest advancements.
By combining expert knowledge, environmental responsibility, and community engagement, you can ensure your tarp tent setup is both effective and sustainable.